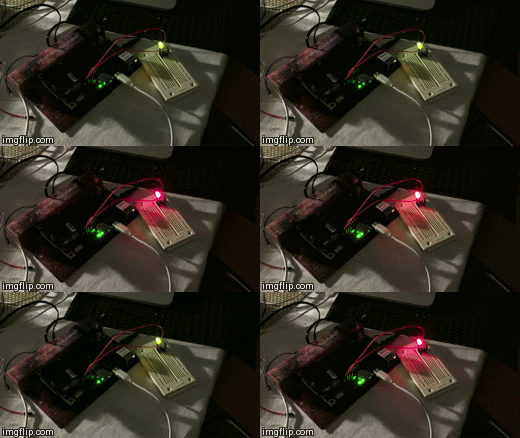
Lessons Of An 11 Year Old With Arduino
0 minutes
I spend some time with my son teaching him to program an Arduino compatible board over the last few days. I just wanted to share some of the things I learned that illustrate his thought process and the resulting code. We used a bread board with a simple two color LED to experiment with. We started with the Blink example code below:
/*
  Blink
  Turns on an LED on for one second, then off for one second, repeatedly.

  This example code is in the public domain.
 */

// Pin 13 has an LED connected on most Arduino boards.
// give it a name:
int led = 13;

// the setup routine runs once when you press reset:
void setup() {
  // initialize the digital pin as an output.
  pinMode(led, OUTPUT);
}

// the loop routine runs over and over again forever:
void loop() {
  digitalWrite(led, HIGH);   // turn the LED on (HIGH is the voltage level)
  delay(1000);               // wait for a second
  digitalWrite(led, LOW);    // turn the LED off by making the voltage LOW
  delay(1000);               // wait for a second
}
The task that I wanted him to accomplish was to cycle the leds from green to red to orange and repeat.
He began by changing the delay for the color from one second to 300 milliseconds,
and then all of the way down to 1 millisecond .
He was distracted for a bit and after coming back to the code he forgot that the 1 represented 1 millisecond and not 1 second. This may be due to the comments no longer matching the code.
Next after explaining to him what
int led = 13;
means he renamed the led variable to red and tried to compile. The program didn’t work because he only changed led at the top of the file and not everywhere that refers to the name ‘led’. The error message:
Blink.ino: In function 'void loop()':
Blink.ino:22:16: error: 'led' was not declared in this scope
Was not at all useful to him and he didn’t even see it at first because it was partially obscured in the Arduino Sketch interface.
After changing all of the references to the name led and introducing a second variable green to refer to a second led he was left with the following code after moving the delay around to different parts of the code:
/*
  Blink
  Turns on an LED on for one second, then off for one second, repeatedly.

  This example code is in the public domain.
 */

// Pin 13 has an LED connected on most Arduino boards.
// give it a name:
int red = 12;
int green = 13;
// the setup routine runs once when you press reset:
void setup() {
  // initialize the digital pin as an output.
  pinMode(red, OUTPUT);
  pinMode(green, OUTPUT);

}

// the loop routine runs over and over again forever:
void loop() {
  digitalWrite(red, HIGH);   // turn the LED on (HIGH is the voltage level)
  digitalWrite(red, LOW);   // turn the LED on (HIGH is the voltage level)

  digitalWrite(green, HIGH);
  digitalWrite(green, LOW);               // wait for a second
      // turn the LED off by making the voltage LOW
   digitalWrite(green, LOW);
  delay(5000);               // wait for a second
  delay(5000);
}
This code doesn’t work as intended and he wasn’t really able to concentrate enough at the time to fix it. Of note is the copy paste errors related to the comments on each line and how they no longer correspond to the code itself.
/*
  Blink
  Turns on an LED on for one second, then off for one second, repeatedly.

  This example code is in the public domain.
 */

// Pin 13 has an LED connected on most Arduino boards.
// give it a name:
int red = 12;
int green = 13;
// the setup routine runs once when you press reset:
void setup() {
  // initialize the digital pin as an output.
  pinMode(red, OUTPUT);
  pinMode(green, OUTPUT);

}

// the loop routine runs over and over again forever:
void loop() {
  digitalWrite(red, HIGH);
  delay(1000);
  digitalWrite(red, LOW);   // turn the LED on (HIGH is the voltage level)

  digitalWrite(green, HIGH);
  delay(1000);
  digitalWrite(green, LOW);

  digitalWrite(red, HIGH);
  digitalWrite(green, HIGH);
  delay(1000);
  digitalWrite(red, LOW);
   digitalWrite(green, LOW);
}
There were several steps required to finally get to this code. The important insight was to realize that the delay should be placed between turning the led on and turning it off.